Sunday, February 10, 2013

Crochet Peter Pan Necklace

Today, I am going to show you how to make this crazy cute peter pan necklace.  I know, I know, I am full of myself when it comes to crochet.  Okay, so the tools you will need to complete this patter are:

G6 size crochet hook or 4 mm
Yarn (I used Caron Simply Soft medium weight worsted yarn in Soft Green [a cute minty green])
Scissors
Needle/thread and One small button

I have not written many patterns like this before.  Mostly they have been for dolls.  What can I say... I am a juvenile delinquent att heart.  Hopefully this pattern will make sense and not be complete jiberish.

Here it goes.

Ch 28.

Row One: Sl St in second Ch from hook and then in the next 4 stitches. 4 Sc in each of the next four spaces.  Hdc in the remaining stitches of your foundation Ch.

Row two: Ch 1, *skip a stich and Hdc, skip a stitch Dc, Ch 1, Dc in that stitch, skip one stitch and *Dc, skip a stitch Dc, Ch 1, Dc in that same stitch, skip one stitch and Dc. This makes a V stitch. (Continue from * until you have four V stitches with the last of the V stitches ending in an Hdc instead of a Dc.) Then Sc and Sl st. **NOTE: You will still have eight stitches on the end of the row.  Don't worry, I'm not crazy, it will work out. Okay, I'm a little crazy but it will still work out! I have a tutorial on the V stitch on YouTube.

Here is a link to my very own YouTube channel.  I finally broke down and made one.  One of my FAVORITE passtimes is to watch random videos and then read the comments.  It is funny to me how worked up people get over the simplest of things. Anywho, here's the link:

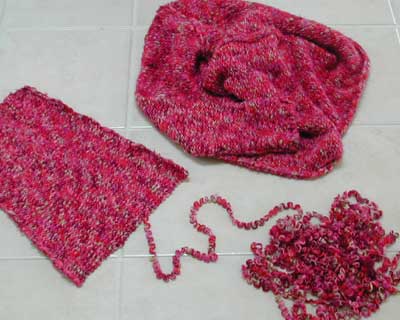
Here's a closeup of the stitches: 


Row Three: Ch 1, flip, Sl st in the Sc of the previous row.  Hdc in the Hdc of the previous row, skip a stitch 2 Dc, Ch 2, 2 Dc in the center of the V stitch on the previous row then *skip a stitch and Dc. (Repeat from * until you have four Double V stitches.)  Finish off the row by doing a Hdc, and a Sl st.  

Row Four: Ch 1, flip, Sl st in the Sc of the previous row.  Hdc in the Hdc of the previous row, skip a stitch 3 Dc, Ch 2, 3 Dc in the center of the V stitch on the previous row. *Skip a stitch and Dc skip a stitch 3 Dc, Ch 2, 3 Dc in the center of the V stitch on the previous row. (Repeat from * until you have four Triple V stitches.)  Finish off your last V stitch by doing a Hdc, and a Sl st.  Then you are going to continue through the row by doing a Hdc, Dc, Hdc, in the next stitch.  *Sl st in the next stitch, Hdc, Dc, Hdc in the next stitch three times. Then Sl st in the remaining stitches.  The last thing you will do is Ch 25 and cut a tail about 5 inches long and pull the end through the last Sl st.  

Tah Dah! you now have one half of your crochet peter pan necklace.  For the second half you will chain 28 plus 5 for a loop to put your button through (with a tail of 2 to 3 inches) and then just weave in the ends and sew down to finish, making sure to make a loop at the corner of your collar.  

And, here's a few more pics of the finished product so you can bask in the glory of my workmanship... er maybe laugh at the shoddy workmanship if you are a more advanced crocheter than I.


Thursday, January 24, 2013

Sunburst Art Project


I have seen a few sunburst projects on Pinterest lately so I thought I would give it a try myself.  I didn't want a mirror because I wanted it for my bedroom originally and I didn't want to accidentally catch a glimpse of myself in the morning and feel bad about myself all day. So i decided to just go to the craft store and figure out what to do.  In Los Angeles, in the Wilshire District, that is easier said than done. There are NO craft stores that are less than 1-1/2 hours away. Can you believe it? There are art supply stores but no real honest to goodness good old corporate America craft stores... What's a girl to do.  There is an art store on Beverly in Hollywood, which is close by so I decided to go with my husband, the artist, to check it out.  To my amazement there were dowels and paper and all sorts of things! I was beside myself.  No yarn... No for now I will have to stick with the expensive mom and pop shops/ordering online and paying exorbitant shipping fees for my yarn needs.  At least I can find pretty paper and paint now.  My anxiety is lessening.

Anywho I find some beautiful paper that is dyed and sold locally.  I figured I would give it a try to use this paper.   Here is a peak of the paper.


When I saw this perfect paper, my mind started racing thinking of all the possibilities.  Then I remembered my unused embroidery hoop.  I thought about it for a second and then decided how brilliant I was.  I skipped over to the area with the dowels and grabbed a package and ended up using 18, I think.  Then I picked out my paint and my husband and walked over to the cash register with our hands and hearts full.

The first thing I did when assembling my sunburst is I took apart my embroider hoop and traced it on a piece of cardboard that came with the paper pack and on the backside of the paper itself.

The next thing I did was measure out the dowels.  I started out with the four longest.  You can make it as big as you want but I wanted mine pretty large because I have big empty 15-foot plaster walls.  At first I cut three different sizes.  Four 16-inch, four 13-inch, and eight 11 inch.  I wanted the large ones to stick out 15 inches from the center, the medium to stick out 12 inches, and the small to stick out 10, so I added an extra inch to each dowel.  i.e. 16-inch, etc.  All I used was an old serrated knife to cut.

After I had all those cut I used some spray adhesive and attached the paper to the round cardboard that I cut.  Then I set it aside and let it dry.  Once I had that drying, I started painting.  It took a few coats.  In hind sight, I might sand lightly sand the dowels and embroidery hoop before I paint them.   The sponge brush I used kept getting caught up on the rough edges.  I had to use a couple of coats to cover them completely.

While those were drying, I used my ruler and found the exact center of the cardboard and paper round.  I made a big X in the middle to use as a guide on the back for where to glue the dowels.

After the dowels and the inner part of the embroidery ring were completely dry, I hot glued all the pieces together.  First I glued the paper and cardboard round to the embroidery ring then glued the longest four dowels using the X that I made previously as a guide.  After that I eyeballed it.

Once I got them all on and took a look at it, it lacked something.  There was no real Umph to it so I decided to add more dowels.  These ones I cut at 9-1/2 inches.  When I was putting them in between all of the 11-inch dowels to see how more would look, I discovered I really liked the two-toned burst look.  This goes to show you that you should never have a completely unmovable picture of what you want made when you set out crafting.  It is only once I did this that I fell in love with the look of the thing! After I glued all 16 dowels between all the gray ones, I figured I wanted the ring to be two-toned as well so I dis-assembled the outer embroider loop.  All I did was tighten remove the screw all the way and take a blade and slowly and carefully lift the metal off of the wood.  Then I glued the outer one (with a little piece of dowel to close the ring) on outside of the smaller ring and vuala! Beautiful sunburst! The very last thing I did was to glue a small piece of dowel I had left over to to be a nail perch.  (This was only after I hung it on the wall to see how it looked to have it fall to the ground.  A dowel fell off and I had to re-glue it.  Bone head move... no doubt.)

There is definitely a sort of giddy delight I get when looking at a finished project that has turned out so well.  It is like falling in love only not... Okay, I know I'm getting carried away but you crafters out there know what I mean. Here is one more picture of the finished project.  I love it so much!


Tuesday, January 22, 2013

Crochet Stitch Tutorials


I haven't posted anything in a while so I thought I would post some explanations of how to do certain things that I found difficult when I first started out crocheting.  I may be dim-witted or something but there were just some things that I did not get until just recently even so here it goes.I haven't posted anything in a while so I thought I would post some explanations of how to do certain things that I found difficult when I first started out crocheting.  I may be dim-witted or something but there were just some things that I did not get until just recently even so here it goes.

Single crochet:  Let's say you have your foundation chain and you are about to start your first single crochet.  The first thing you need to know is if you are crocheting in a row for something like a scarf or a blanket, you will skip the first chain from your hook.  You NEVER count the chain that is wrapped around your hook as the first chain.  You will insert your hook into the second chain from the hook and go from there.  After you insert, yarn over or YO, which simply means to wrap the yarn around the hook then pull it through.  You will now have to loops on your hook.  Once you have the two loops on your hook then you will YO again and pull through both loops and there you have it, you have made your first single crochet or Sc.

Slip stitch (Sl St):  A slip stitch is used to close of a row.  All you do is insert your hook Yo, and pull the yarn through both loops on your hook then snip the yarn and pull the end all the way through.

Half double crochet (Hdc):  Remember the rule with the Sc, where you skip a chain?  Well you will do the same here when working in a row.  Similarly when moving to the second row in any work with any stitch, you will chain one or Ch 1 as your first stitch of the next row.  To start an Hdc, yarn over, insert hook, yarn over and pull through.  Then you will yarn over once more and pull through all three loops.  Now you have successfully created your first Hdc. Congratulations! 

Double crochet (Dc):  When starting out from a foundation row, you will skip two chains.  Yarn over, insert hook, Yo, and pull through.  You will have four loops on your hook.  Yo and pull through two loops.  Yo and pull through the remaining two loops.  This is a double crochet.  

Magic Ring:  This one threw me for a loop... No pun intended.  I could not figure it out from any of the diagrams or descriptions so I found this video that helped a lot! I was amazed at how easy it was.  http://www.youtube.com/watch?v=WLuSVyKvoUg

An increase or Inc is very simple.  All an increase is is crocheting in the same stitch that you crocheted on the previous stitch.  So you will be crocheting two stitches in one stitch from the previous row.  In other words, start by inserting your hook and make your first stitch of the increase then when you are finished insert your hook in the same spot as before and make your second stitch.  In a round, you will most commonly see a six Inc pattern that equal up to the total number of stitches for the row and  you will start with six stitches in your magic ring.  I.e.: 2 x 6 = 12.  So you will increase on every stitch around from your original six stitches.  Then the next would be 3 x 6 = 18, so you will Inc on the third stitch in the row.  The goal is a gradual widening of your round.

A decrease of Dec is the exact opposite of an inc.  All you will do is skip one stitch of the previous row.  This gives you a gradual narrowing of your round to close your sphere.  As with the Inc, you will work in multiples of six.

Chain 2 Method: The other way to start to work in a round is the Ch 2 method.  I like this method for beginners because it is easier to work with.  You have less of a chance of having multiple failures when first starting the ring.  What you do is create a slip stitch around your hook.  Then you will Ch 2.  In the second Ch from the hook, you will do six single crochets in that Ch then slip stitch to join the first and last Sc.  

If you are having any trouble with my descriptions, a website that I found helpful for most of these stitches is: www.stitchdiva.com

I hope this is helpful for anyone who is trying to learn how to crochet and I hope you grow to love it as much as I do!

Thursday, November 8, 2012

Here is my latest crochet project.  I made it for a friend who wanted to surprise her mom with it.  It is a crochet penguin pillow! As you can see I used the magic ring crochet six method on this.  I do not have a pattern made up yet, as I am not sure I will ever have a use to make another one but if you want to make one, I used bulky weight yarn, a size G hook, and a 10 inch round pillowform. I think my final increase row was 6 increases of 14 stitches and I used single crochet.  I made one in black and one in white so that would go something like this.

6 sc into a magic ring.
Inc. around to make 12.
Sc, Inc. around to make 18.
Sc 2 times, Inc. around to make 24.
Sc 3 times, Inc. around to make 30.
Sc 4 times, Inc. around to make 36.
Sc 5 times, Inc. around to make 42.
Sc 6 times, Inc. around to make 48.
Etc. until it is big enough around just increasing the amount of single crochets by one on each round and you will increase six times in each round.

When you are finished increasing, just sc all the way around for three rows. 

For the feet, I made another magic ring (for each foot) and then sc 6 then ch 1, flip, and inc in each stitch to make 12, then ch 1, sc, inc. around the half circle to make 18.

For the beak:  Chain 9.  In the second ch from hook, sc then sc across, ch 1.  Turn and sc across in each stitch.  *Then you want to flip without chaining one and sc in the second stitch from the hook.  Ch 1, sc in each stitch.  Continue from * and keep going until there is only one sc in the row.

The eyes are just a magic ring, crochet six.

The wings, are the same procedure as the beak just longer.  I just measured out a chain for how long I wanted the wings and then went from there. 

That is basically the pattern.  If you have questions, please let me know.

Saturday, September 29, 2012

Crocodile Headband


--> This is my Crocodile Headband.  I saw a picture of one and I thought, ‘I can make that!’ I had to find a few tutorials because none of them were specifically for the shape that I was after and I am new to the crocodile stitch.  EEK! I decided to go with a two tone color scheme. The example I saw was three-toned.  VERY CUTE! They had a different headband piece than I have. The example had an open headband… I like mine better… I am a bit prejudiced, I suppose. I finished mine in an evening and it probably would have gone faster if I wasn’t figuring out what I was doing as I was doing it.  It was all worth it though!  Here is how you do it.

A closeup of the lovely headband or earmuff... whatever.
1. Ch 6 and joint at the beginning of the round.

2. Ch 3, 4 DC through the ring, Ch 1, 5 DC.  This makes your first crocodile scale.

3. Ch 3 (counts as first DC), DC in next stitch, Ch 2 *Skip two stitches then 2 DC, Ch 2.  Repeat from * to make six posts. 

4. Ch 3 (Counts as first DC) DC 4 behind first post, Ch 1 then put 5 DC behind the other post, Ch 1.  *Skip middle two posts and put 5 DC behind the second to last post, Ch 1, 5 DC behind last post to make two scales.

5.  Ch 3, DC in next spot, *Ch 2, skip two stitches, 2 DC and repeat from * to the end.

7. Repeat Step 4 to make 3 scales.

6. In order to decrease the amount of Crocodile scales, Sl. St. over two spaces until you are just above the inside edge of the first scale on the previous row then repeat step 4.  Continue repeating these steps until you have Three sets of two and three sets of three. 

If you are having trouble with the crocodile stitch, there is an excellent tutorial on youtube. Check it out!  http://www.youtube.com/watch?v=RUNtrp_Vj4o

8. The next step is just to ensure that you have an even number of stitches for your puff stitch.  There needs to be a multiple of two. So just sc across the top row.  There should be 18 across the top.

9. For the puff stitch all you do is ch 3, YO, insert hook into first stitch that is not part of the ch, YO, pull through, YO, insert hook, YO and pull through again.  Once more! YO, insert hook, YO, and pull through one last time.  Then you YO once more and pull it through all the loops on your hook.  There should be 7 loops on your hook.  Continue this step through the row making sure to skip a stitch in between the puff stitches.  To finish off the row, make a DC in the last stitch.

10.  Repeat this for each row.  I did four rows of the same amount and then I decreased one puff stitch and that gave it a gradual thinning. I ended up with 44 rows of the puff stitch. 

To finish it off, sew on a button and weave in the ends.  I made my button.  I bought metal button pieces and covered them in fabric.  You can pick them up at any craft store.  Now that you are done, go try it on and admire how cute you look in your new crocodile headband!


Thursday, September 20, 2012

My Very First Big Crochet Project

I have always done small crochet projects. Dolls, baby shoes, hats, flowers, etc. For a while now, I have wanted to make something big but was afraid I would get sick of it and abandon the project. The way I have abandoned many other large projects. 

Recently my hubby and I moved to Los Angeles.  I am without a car all day and my studly husband works far away so I have a lot of time at home since I work from home. I needed a project so, I have decided to make a blanket!!! I am very excited about this blanket... three exclamation points worth, apparently.

It is a ripple pattern. I am doing thick stripes of leafy green and dark royal blue.  They are looking a bit like the chevron stripes that are so popular these days and it's turning out very nicely. I will post pics when it gets closer to being done. It is not one of my patterns but here is the link to the pattern that I am using: http://www.handcraftingwithlove.net/yarn/pat-ripple.html